Thursday, 24 October 2013

Daily Juice

3 Day Juice Detox
 
Juice for lunch containing 2 cm of beetroot + lots of other goodies.


The last month I have been extremely healthy. I have been juicing big time! The onset was a tough round of antibiotics and feeling pretty low. So when my brother told me about this 3 day juice detox he was going to do, I immediately jumped in with an “easy...I can do that too”!
So I downloaded the app, Juice Master 3 Day Detox, which I must admit is very well set up, holds just the right amount of information, shopping lists and good instructions (this is my own opinion, don’t get any financial benefit from writing positive here). With this I went to market (if you read my previous post you would have seen all the good stuff I got for juicing) and dusted off my juicer.

The guy who set up the app, Jason Vale, gives a pep-talk each day to help you succeed. What Jamie Oliver is for healthy eating, he is for juicing. This is what he said in the video (his coaching, my words): The first day you will feel crap – me: I felt crap (but I am being proactive about my health, yeah!), the second day you will start to feel better, more energetic –  me: big headache, I still felt crap (but I am definitely continuing). The third day you will feel fantastic – me: more headache, I still feel crap (what the!!).
Ok, so I didn’t feel the fantastic energy levels I had expected, I still had headaches. I had done everything right– so it must just take longer for me to detox?! I felt a bit hungry the first day and only a little on the second. The coaching tells you that you can eat an avocado to deal with hunger and I did – but I ate nothing else. The great thing is, you blend avocado into your juice and that way you get this fantastic filling creamy smoothie. The recipes are great; the drinks are delicious and filling. So when I did not feel any better on the third day, I decided to continue until I would. I stayed on juice only for 4.5 days and started to feel good. I did lose some weight, but that was just a bonus, not my main objective. I kept juicing morning and lunch for another week and now 4 weeks down the track I juice as often as I can as a supplement to normal diet. And I have noticed changes, first of all my skin has become soft and shiny, like no moisturiser has ever done (I have known all the time that they actually lie, this shows me that soft skin comes from within, not in a bottle) my mood has definitely lifted and I feel more energetic, happier! It feels good to do something for my health and I am so lucky to have a market, an organic shop and a local farmer, where I can get great fresh stuff, fairly cheap. I experienced some hunger the first 1.5 day and it was a bit challenging to cook dinner for the family and say no to cake at a work function. But as the days passed it did not bother me at all and I got addicted to the juice, even chose it over coffee and tea!
The only down side to juicing: my family can’t stand the noise and the washing up of the juicer and blender is tedious … and holes all over the garden, where I dig in the juicing pulp to feed the worms – there must be a better way. So all positive thumbs up for juicing for health!
xo Sarah


3 Day Juice Detox
 
Apple/Ginger and Blueberry Smoothie
 
 
Juicing Equipment
 
Fruit and Veg from market, and my not very expensive juicer. You also need a blender to blend the juice with ice and avocado to make it deliciously creamy.

Wednesday, 16 October 2013

Off to Market We Go


Fresh Vegetables at Redcliffe Market


I love going to a good fresh food market. The markets here in Australia are superb! When we lived in Melbourne, we were spoilt for luxurious fresh food markets. I had a studio in Prahran and my favourite was the Prahran Market was just across the road. A gourmet’s paradise! But the market here in Redcliffe is not bad at all. In fact it is pretty good and within the last year it has improved significantly… renovation of the forefront by the council, relocation of the market up the street instead of being hidden, a lot more interesting stalls, and best of all; the street has finally been closed off for traffic – it took the council a while to figure that one out!! Now we just need some more music and street performers and it will be tops! I love buying direct from the growers that are there, it's fresh it's local and it is not the supermarket. I fill my old nannas trolley with fruit, veg, salami, fish, eggs, cheese until the wheels are struggling – and then a coffee break looking out over Moreton Bay towards Moreton Island, it is great!! Come to market by the sea next Sunday morning….
 
Pedestrian Friendly Street Market
No traffic anymore, it is spacious and peaceful - it is great!

The new look of renovated Redcliffe, streets and wind sculpture


Redcliffe marked and Redcliffe Pier
Entry to Redcliffe Pier

Coffee Break at Redcliffe Pier
Coffee Break


Fresh Produce from Redcliffe Market


And finally, but not least, my glorious stash! These babies’ will supply lots of vitamins to me and my family during the next week... see you next Sunday!
 
xo Sarah
 

Thursday, 3 October 2013

Sourdough with Buckwheat

Food Styling sourdough bread


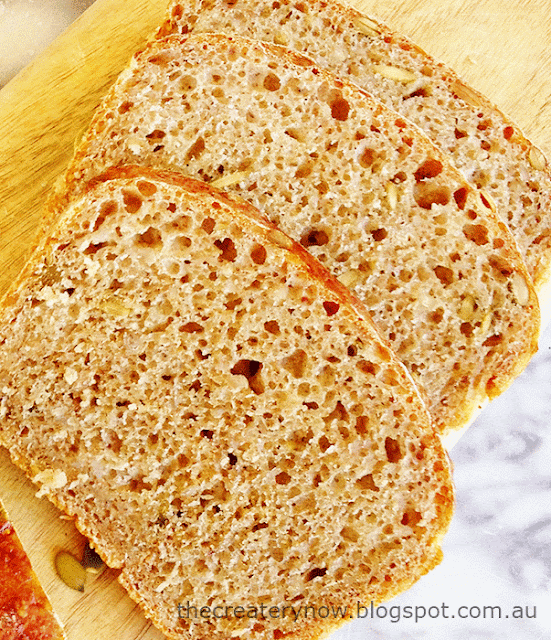
This bread with cooked buckwheat groats is soft and moist, perfect with butter, cheese and a cup of tea. It has a little bit of wholemeal flour, which gives it more flavour and fibre. The pumpkin seeds are nice and crunchy, but the buckwheat you hardly notice, it just adds a nice mild flavour and gives it the moisture. And it is super healthy; it has been linked to lowered risk of developing high cholesterol and high blood pressure.


Breadmaking


Sourdough Breadmaking


Sea salt


Sourdough breadmaking


Bread with Pumpkin Seed and Buckwheat


2 loaves:

Ingredients

5 dl cold water

¼ tsp dried yeast or 10 g fresh

1 dl sourdough starter

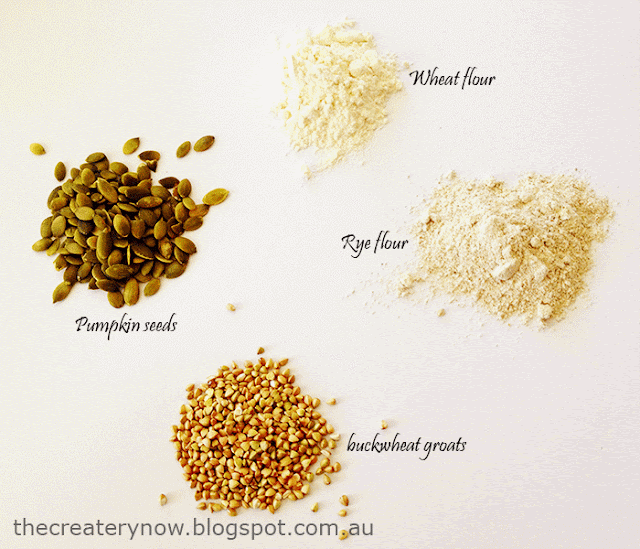
150 g whole buckwheat groats (kernels)

100 g pumpkin seeds/pepita

150 g wholemeal flour

650 g wheat flour

15 g of sea salt


Day 1:

1.      You cook buckwheat like you cook your rice: add the groats to a pot and pour cold water in the pot until the water level is approx. 2 cm above the groats. Cover with a lid and bring to the boil, turn heat down and cook for a further 10 minutes. Now turn off the heat and let the pot sit, lid on, until the buckwheat is soft and fully cooked.


2.      Pour the cold water in a bowl, add yeast and sourdough and stir until dissolved. Add the cooled buckwheat groats and the pumpkin seeds. Add the wholemeal flour, the wheat flour and salt. Now you need to stir and knead until the dough does not stick to the sides of the bowl anymore. If you have a mixer this is easy – if you do it by hand it takes some kneading... but don’t fret, it is actually quite therapeutic… or at least it helps to think so. Keep going, your dough needs to be very elastic, which means when you pinch it and pull, you should be able to pull a fair bit; it thinning to almost see-through before it snaps. If not, knead 10 more minutes.


3.      Brush a bowl lightly with oil and place you dough in it. Cover with cling film and refrigerate for 24 hours.


Day 2:

1.      Carefully pour your dough onto a flour dusted kitchen table. Cut it in two and shape into your desired loaf shape. You can also put you dough into oiled bread tins if you prefer. Cover them with cling film,which you also brush with oil to avoid it sticking to your dough. Let them prove for a couple of hours.


2.       If you don’t have them in tins, but want to bake them on a tray and if you have a baking stone put it in the oven to heat. Heat the oven to 220 degrees. Once very hot, carefully push the breads onto the baking stone – or just put your tins in the oven. I always have an extra empty baking tin heating at the bottom of the oven and when I put the bread in the oven, I throw a cup of cold water in the hot tin. The steam gives the bread that crispy bubbly crust – delicious!


Wednesday, 2 October 2013

Sneaky Fox Embroidery


I embroidered this fox. Who is looking for an adventure, me I guess?! Maybe you too??


For the lettering I used a pen with ink that disappears slowly after it has been applied. A tip for successful lettering is to only write a few letters at a time, then embroider them, write the next letters etc. In this way you can adjust the writing as you go along.


I used Running stitch, Back stitch, Stem stitch and Blanket stitch for this one.
 
xo Sarah
Related Posts Plugin for WordPress, Blogger...