Sour Dough with Zucchini
I bake a lot. I love freshly baked goods especially with a bit of health thrown in and also knowing exactly what I am feeding my family. Most of the breads I make are of the very robust kind - sour dough, grain, seeds and wholemeal flours. But as I also do have a sweet tooth sometimes a cakes is in the mix. I use recipes, but I also often just add and mix to that particular dough what I feel like on the day. When I did the post for Bread with Buckwheat it took forever editing the pictures and organising the setup, so until I have a fantastic camera like Nora's I might just stick with simple pictures for these Daily Bread posts. They are meant for inspiration - and I will add recipes later.
My mum makes this delicious Crab Apple Jelly - beside the taste the colour is so vibrant and beautiful.
The Crab apples are grown in my parents garden in Denmark. When my brother came for a visit to Australia two weeks ago, his suitcase contained 7 jars of my mum's homemade jams - heaven! Thanks mum!
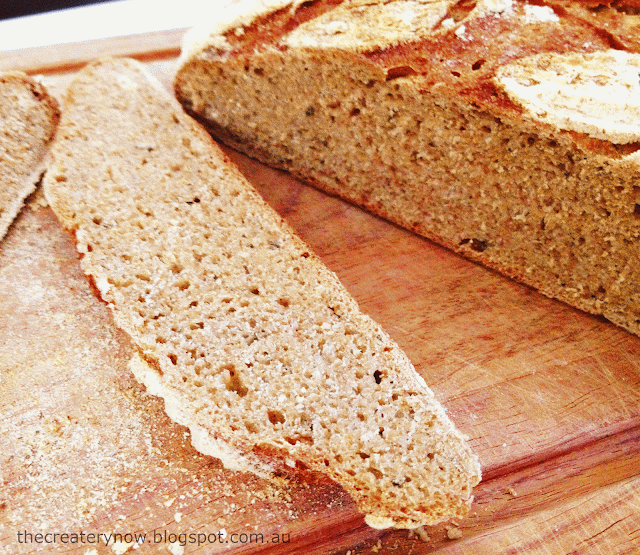
Grated Zucchini was added to the dough. This makes the bread lovely and moist on the inside.
Sour Dough Bread with Grated Zucchini
1 large loaf or 2 small ones:
Ingredients
500 ml of water
2 tbsp oil e.g. canola or vegetable
1 tbsp sea salt
1 tbsp of honey
100 ml sour dough starter (or if you do not have this then
use 1 tsp dried yeast, or 20 g of fresh yeast)
1/4 tsp dried yeast, additional to your sour dough starter.
650 g of plain wheat flour
200 g of wholemeal spelt or other wholemeal flour (I used
rye flour)
1 zucchini (approx. 250 g) coarsely grated
Day 1
Mix water, oil, salt, honey and sour dough starter in your
bowl. Mix in both flours a little at a time. This dough is very soft, so there
is no kneading here, just give it a really good stir/mix with your spoon. I use
a machine, but using a wooden spoon is no problem.
Now if you like, before you
add the zucchini take some of the dough and save for your next sour dough
starter. Then add the zucchini.
Scrape the dough into you bread tins, one large
one or two small ones depending on what size bread you want. Press down and even
out the dough with a spatula (if you put cold water on the spatula it does not
stick to the dough).
Spray or brush some oil on some cling film and cover your
tins. The oil ensures that you can remove the film easily without the dough
sticking to it. Leave to rise overnight in the fridge or if it is not too hot
then on the kitchen bench.
Day 2
If you had the dough in the fridge, it might not have rise fully. Take it out and let it sit on the kitchen bench and “wake up” for a few hours before
baking. No matter how you do it, the most important thing is that it has risen
by about a third or more of its size. Recipes often state a time for the “proving” of
the dough, but often I find that the dough needs much longer what the recipe
says. It is better not to hurry this, wait another hour if your bread has not
risen high enough.
Turn on your oven on high, 225 degrees, put an empty bread
tin at the bottom of the oven to heat up. Once you put your loaves in the oven,
throw ½ cup water into the empty tin and close the oven door quickly. The steam
will give you that nice crispy bubbly crust on your bread. After about 10
minutes; turn down the heat to 200 degrees. Bake for approx. 30 min. for two
small loaves or 45 min for one large one.
All ovens are different, so always check
whether it looks nice and brown and done. Sometimes I remove the tins and give
them 5 minutes more in the oven to crisp up. Tip: you will know if your bread
is done by knocking on the bottom side of it - if it sounds hollow then it is
done. Bon appetite!
xo Sarah
PS. do not leave your loaves on the kitchen bench if it is a warm night! I should know better living in Australia, but the fridge was full and I was tired! When I went to bed all looked fine - when I got up in the morning... dough explosion!!


